In this article we will learn about html attributes and how to implement these html attributes with the help of illustrations.
Recently we have discussed about HTML elements, in which we have illustrate basic HTML tags and elements in simplest form like <h1> , <p>, <div> etc - but most of the html tags have attributes which provide additional information about html elements. The attributes are made up of two pairs i.e., name and value
• name is a name of property that you want to assign the element).
• value is a value of property name that can be aligned over the element.
And all these attributes are placed inside the element's opening tag.
Syntax
<element attribute_name="attribute_value">Content</element>The src attribute
The src attribute is required if you want to embed or display an image on a web page. We use the src attribute inside the <img> element opening tag, which specifies the path or location of the image to be displayed on the web page.
Now let's illustrate html src attribute with the help of following example;
<!DOCTYPE html><html>
<head>
<title>Html src attribute example</title>
</head>
<body>
<h2> Example of src attribute in html</h2>
<img src="https://upload.wikimedia.org/wikipedia/commons/3/38/HTML5_Badge.svg">
</body>
</html>Output
The alt attribute
This attribute is commonly used in the <img> tag to specify alternative text for an image. If for some reason the image is not displayed (slow internet or error in src attribute), then this alternative text comes in place of that image.
Now let's illustrate HTML alt attribute with the help of following example;
<!DOCTYPE html><html>
<head>
<title>Html alt attribute example</title>
</head>
<body>
<h2> Example of alt attribute in html</h2>
<img src="https://upload.wikimedia.org/wikipedia/commons/3/38/HTML5_Badge.svg" alt="Html">
</body>
</html>Output
The width and height attribute
The width and height attribute is used to adjust or change the width and height of an image. We use this attribute inside the <img> element opening tag just after the src attribute is completed.
Now let's illustrate HTML width and height attribute with the help of following example;
<!DOCTYPE html><html>
<head>
<title>Html width and height attribute example</title>
</head>
<body>
<h2> Example of width and height attribute in html</h2>
<img src="https://upload.wikimedia.org/wikipedia/commons/3/38/HTML5_Badge.svg" alt="Html" width="500" height="333">
</body>
</html>Output
The href attribute
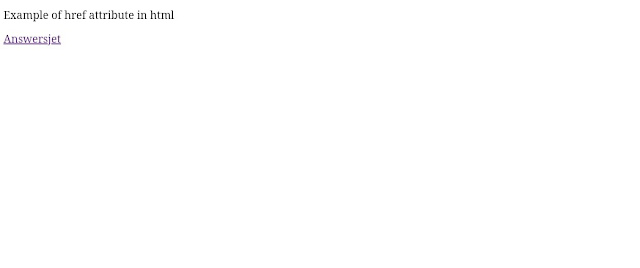
The href is the main attribute of the <a> element and is implemented inside the <a> element's opening tag. The main function of href attribute is to specify link to any web address and provide a hyperlink and by default this link opens in the same tab but if we use target attribute and add value to "blank" then This link opens in new tab.
Now let's illustrate HTML href attribute with the help of following example;
<!DOCTYPE html><html>
<head>
<title>Html href attribute example</title>
</head>
<body>
<p>Example of href attribute in html</p>
<a href="https://www.answersjet.com">Answersjet</a>
</body>
</html>Output
The id attribute
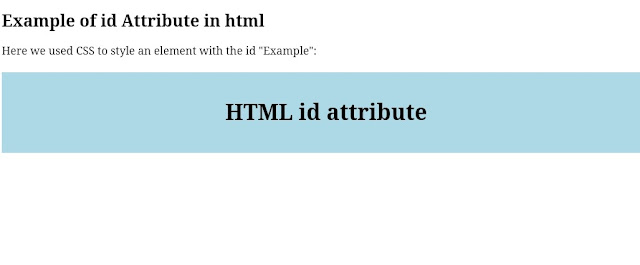
Sometimes it may find very difficult to access a particular element whose name may be same as others. In that situation, the id attribute is used which provides a unique identity to the element within an html page.
Now let's illustrate HTML id attribute with the help of following example;
<!DOCTYPE html><html>
<head>
<style>
#Example {
background-color: lightblue;
color: black;
padding: 40px;
text-align: center;
}
</style>
</head>
<body>
<h2>Example of id Attribute in html</h2>
<p>Here we used CSS to style an element with the id "Example":</p>
<h1 id="Example">HTML id attribute</h1>
</body>
</html>Output
The class attribute
The class attribute is used to define element's one or more class names. The class attribute is the universal attribute that can be used on any HTML element. These class names are commonly used by CSS and JavaScript to perform a various tasks with the specified class names.
Now let's illustrate HTML class attribute with the help of following example;
<!DOCTYPE html><html>
<head>
<style>
p.important {
color: Green;
text-align: center;
}
</style>
</head>
<body>
<h2>Example of class Attribute in html</h2>
<p>Here we used CSS to style an element with the class</p>
<p class="important">HTML class attribute</p>
</body>
</html>Output
The title attribute
The title attribute returns the suggested text(tooltip text) for the element when any user moves the cursor over a title or any text. It is part of global attributes which means it can be used on any html elements.
Now let's illustrate html title attribute with the help of following example;
<!DOCTYPE html><html>
<head>
<title>HTML title attribute example</title>
</head>
<body>
<h1 title="This is heading tag">Example of title attribute in html</h1>
<p title="This is paragraph tag">Move the cursor over the heading and paragraph, and you will see a tooltip</p>
</body>
</html>Output
The style attribute
The style attribute is used to provide various dynamic CSS or style effects (such as color, font, size, etc.) to an element within an HTML page.
Now let's illustrate HTML style attribute with the help of following example;
<!DOCTYPE html><html>
<head>
<title>HTML style attribute example</title>
</head>
<body>
<h1> This is Style attribute in html</h1>
<p style="color: blue">It will change the color of text</p>
<p style="color: red">It will also change the color of text</p>
</body>
</html>Output
The lang attribute
The lang attribute is used to declare the language of the HTML page. It is a good practice to declare the language by include lang attribute inside <html> tag.
Now let's illustrate HTML lang attribute with the help of following example;
<!DOCTYPE html><html lang= "en">
<head>
<title>HTML lang attribute example</title>
</head>
<body>
<p>This HTML page is using English Language</p>
</body>
</html>Output
This HTML page is using English LanguageThe dir attribute
The dir attribute specifies the direction of elements in which the text should flow. It is essential that the html page supports all languages that are in rtl (right-to-left) and ltr (left-to-right) order. The dir attribute is also includes inside <html> tag.
Now let's illustrate HTML dir attribute with the help of following example;
<!DOCTYPE html><html dir= "rtl">
<head>
<title>html dir example</title>
</head>
<body>
<p>It is example of dir attribute in html</p>
</body>
</html>Output
Conclusion
Above we have discussed about html attributes and how to implement these html attributes with the help of illustrations. The attributes are made up of two pairs i.e., name and value and all these attributes are placed inside the element's opening tag. I hope this information is helpful to you all.


